Level editor
Fruit Swipe Match 3 Kit provides a visual editor that allows you to change the settings of the game and create new levels easily and without the need of programming. You can access the editor by selecting the Editor option located in the Tools/Fruit Swipe Match 3 Kit menu. The editor is divided in three areas and we are going to cover every one of them in the following sections.
There are two other useful options in the menu, Delete PlayerPrefs and Delete EditorPrefs, that are shortcuts for deleting your PlayerPrefs and your EditorPrefs respectively. They are particularly convenient when you are testing your game and need to start from a clean state.
Game settings tab
The Game settings tab allows you to change the general settings of the game. At the top of the Game settings tab, we have the Asset field, in which you can specify the current game configuration asset to edit (the asset will be automatically saved when saving the project). You can create a new game configuration asset by right-clicking on the Project window and selecting the Create/Fruit Swipe Match 3 Kit/Game configuration option.

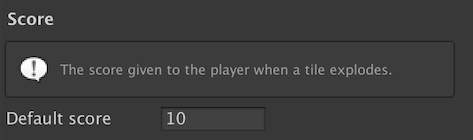
In the Score area, you can set the default score given to the player when a tile explodes.
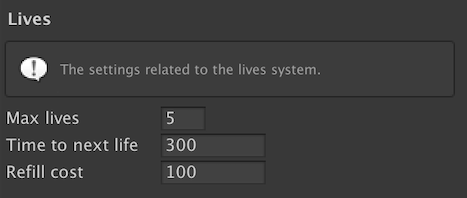
In the Lives area, you can change the following properties of the lives system:
- Max lives: The maximum number of lives the player can have.
- Time to next life: The time left (in seconds) until a free life is given to the player.
- Refill cost: The cost in coins to fill the number of lives to its maximum.
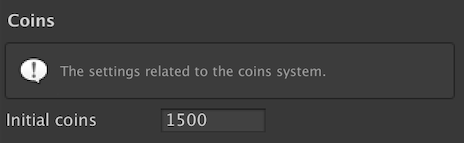
In the Coins area, you can change the number of coins initially given to the player.
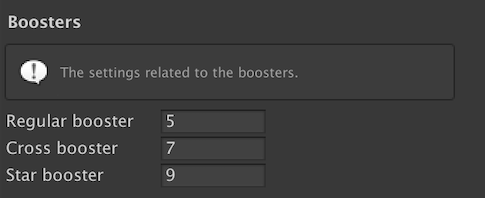
In the Boosters area, you can define the minimum amount of tiles a match should have in order to obtain a booster.
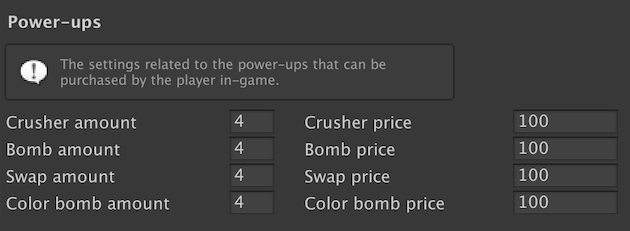
In the Power-ups area, you can set the amount and cost of the in-game purchasable power-ups.
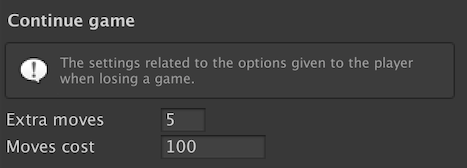
In the Continue game area, you can change the following properties of the continue system (i.e., after he loses a game):
- Extra moves: The number of extra moves given to the player when he purchases additional moves.
- Moves cost: The cost in coins of the extra moves.
In the Resolutions tab, you can define the following values:
- Default zoom level: The default zoom to apply to the game camera. This will affect how big the game board will be in relation to the screen's width.
- Default canvas scaling match: The default value to apply to the canvas scaler component's Match property.
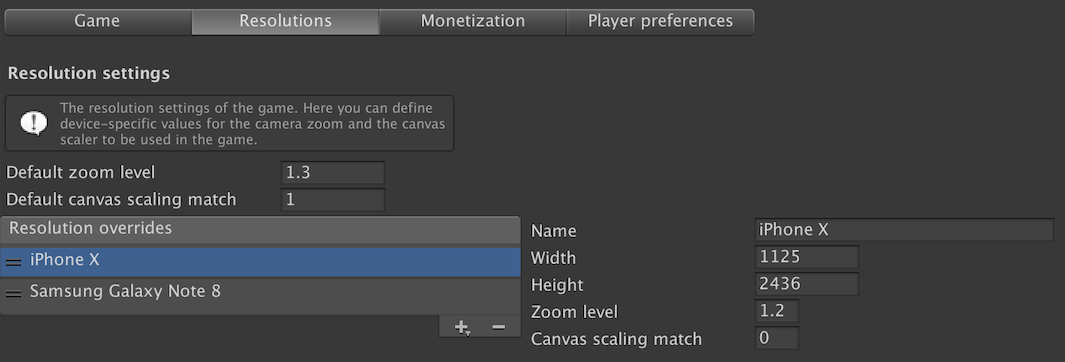
In addition, you can define new resolution overrides. A resolution override is a set of different values for the aforementioned properties that will be applied on the devices with the specified resolution (width and height). Why is this needed? The reality of multi-device development is that it is basically impossible to define a single resolution that will work well across every single device available on the market. The best we can do is to define sensible default values that work well across a wide range of devices and then have special cases for devices with very exotic aspect ratios. As a practical example of this, we provide reasonable default values in the kit together with two overrides, for the iPhone X and the Samsung Galaxy Note 8 respectively, because the default values do not work very well on them. Should you find a device where the default values do not look good, you can simply add a new override for that particular device (also, please feel free to send the override to us so that we can add it as a default part of the kit).
In the Monetization tab, you can configure the Unity Ads (for rewarded ads) and Unity IAP (for in-app purchases) settings of your game. You can find more information about them here.
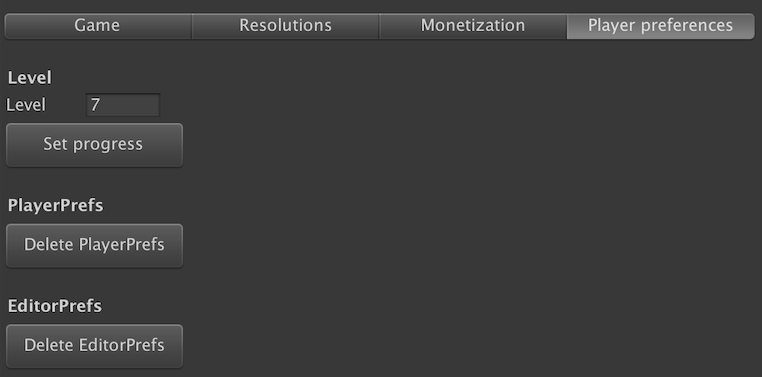
In the Player preferences tab, you can set the current progress of the game. You can also delete your PlayerPrefs and your EditorPrefs. This is particularly useful during testing.
Level editor tab
The Level editor tab allows you to create your own levels for the game. At the top of the Level editor tab, we have the Asset field, in which you can specify the current level asset to edit (the asset will be automatically saved when saving the project). You can create a new level asset by right-clicking on the Project window and selecting the Create/Fruit Swipe Match 3 Kit/Level option. The default levels are located in the Resources/Levels folder.
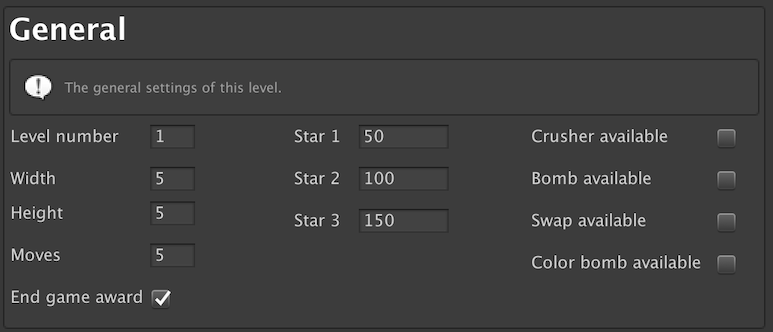
In the General area, you can change the following settings of the level:
- Level number: The number of the level.
- Width: The width of the level.
- Height: The height of the level.
- Moves: The number of moves available to the player.
- End game award: Indicates whether the player is rewarded with extra boosters for every remaining move after completing the level.
- Star 1 score: The score needed to unlock the first star of the level.
- Star 2 score: The score needed to unlock the second star of the level.
- Star 3 score: The score needed to unlock the third star of the level.
- Crusher available: Indicates whether the crusher power-up is available for purchase on this level.
- Bomb available: Indicates whether the bomb power-up is available for purchase on this level.
- Swap available: Indicates whether the swap power-up is available for purchase on this level.
- Color bomb available: Indicates whether the color bomb power-up is available for purchase on this level.
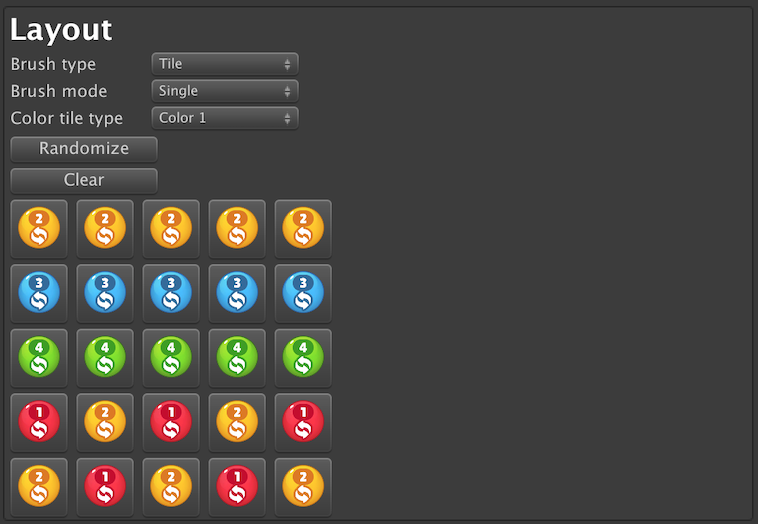
You can also design the layout of your level via the Brush type, Tile type and Brush mode fields. There is an utility Randomize button to automatically randomize the level.
It is important to note that, while you can design your levels using fixed tile colors, you can also use the random tile types to provide more variety to the player. This makes it possible to have a level using different tile colors every time it is played (the random color selection takes into account the colors defined in the Available colors area).
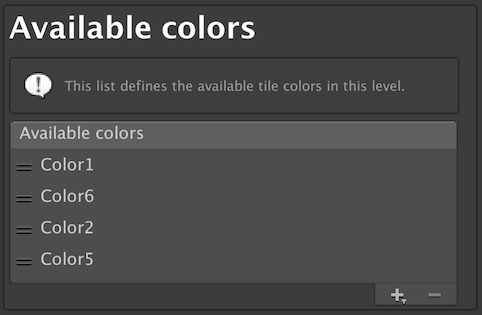
In the Available colors area, you can specify which colors are available when generating new random tiles on the level.
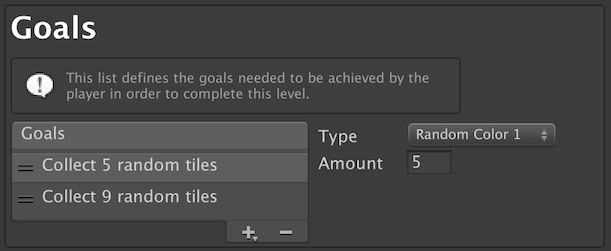
In the Goals area, you can specify the goals that the player needs to accomplish in order to complete the level.
About tab
The About tab contains useful links to the kit's documentation and licensing information.